Cognee + Continue Integration
Continue provides a seamless interface to interact with Cognee’s MCP (Model Context Provider) server—much like Roo. This integration enables powerful knowledge graph capabilities directly within your IDE, enhancing code understanding and AI assistance. This guide walks you through setting up Continue and configuring Cognee’s MCP server for an optimized development experience.
Benefits of Cognee + Continue
By integrating Cognee with Continue, you unlock several key advantages:
- Enhanced Code Understanding: Cognee builds comprehensive knowledge graphs of your codebase which can enhance AI assistance
- Contextually Aware Assistance: Get AI completions that truly understand your project structure
- Improved Code Quality: Receive more relevant and accurate suggestions for your specific codebase
- Seamless IDE Experience: Work with powerful AI assistance without leaving your development environment
Setup Requirements
Before you begin the integration process, ensure you have:
- A supported IDE (VS Code, JetBrains IDEs)
- A Continue Hub account
- Successfully logged into Continue in your IDE
Let’s walk through the setup process step-by-step.
1. Fill Cognee Environment File
-
Download the Cognee environment file from the Cognee repository.
-
Fill in the necessary details in the environment file.
NOTE: Remove all quotations marks ( ” ” ) in the file! DB_PROVIDER=“sqlite” will not work, it must be for example DB_PROVIDER=sqlite
Make sure to also add the following embedding settings to the file:
EMBEDDING_PROVIDER=fastembed EMBEDDING_MODEL=sentence-transformers/all-MiniLM-L6-v2 EMBEDDING_DIMENSIONS=384 EMBEDDING_MAX_TOKENS=256 -
Save the file in a location of your choice.
-
Note down the path to this file as you will need it for the next steps.
2. Install Continue
-
Open your preferred IDE
-
Install the Continue extension following the official documentation
-
Create and log in to your Continue Hub account
-
Set necessary configurations and secrets in Continue for Continue to work with cognee. Cognee specific environment secrets explained:
- COGNEE_ENV_FILE_PATH: Points to the location of your Cognee environment file, which contains configuration settings for the Cognee MCP server. This file typically includes API keys, model preferences, and other operational parameters. This file must be filled properly for Cognee to work.
- COGNEE_SHARED_DIR_PATH: This parameter specifies a local directory for data sharing between Cognee and Continue. It plays a critical role in exchanging knowledge graph details, caching results, and preserving session state. To enable Cognee to codify the repository you’re working on, the repo must be at this shared path location.
-
Verify the installation by opening the Continue panel in your IDE
Note: Continue will need to be configured to work with AI providers after installation
3. Configure Continue to Use Cognee
Continue offers two integration methods for working with cognee:
-
Pre-built Assistant Option:
- Use the ready-made
cogneeassistant - Access standard knowledge graph capabilities
- Use the ready-made
-
Custom Assistant Option:
- Build your own using the
Cognee Context Providerblock - Customize the integration to your specific needs
- Requires additional configuration
- Build your own using the
Choose your preferred method and proceed with:
- Open VSCode and use
SHIFT-COMMAND-P(Mac) - Select
Continue: Open in new window - In the top right corner, choose either:
- Pre-built
cogneeassistant - Your custom assistant with Cognee Context Provider
- Pre-built
4. Restart Continue
Restart your IDE to ensure the updated Continue configuration is applied. You should see Continue recognizing the cognee integration on startup.
5. Use Continue + Cognee for Enhanced Code Assistance
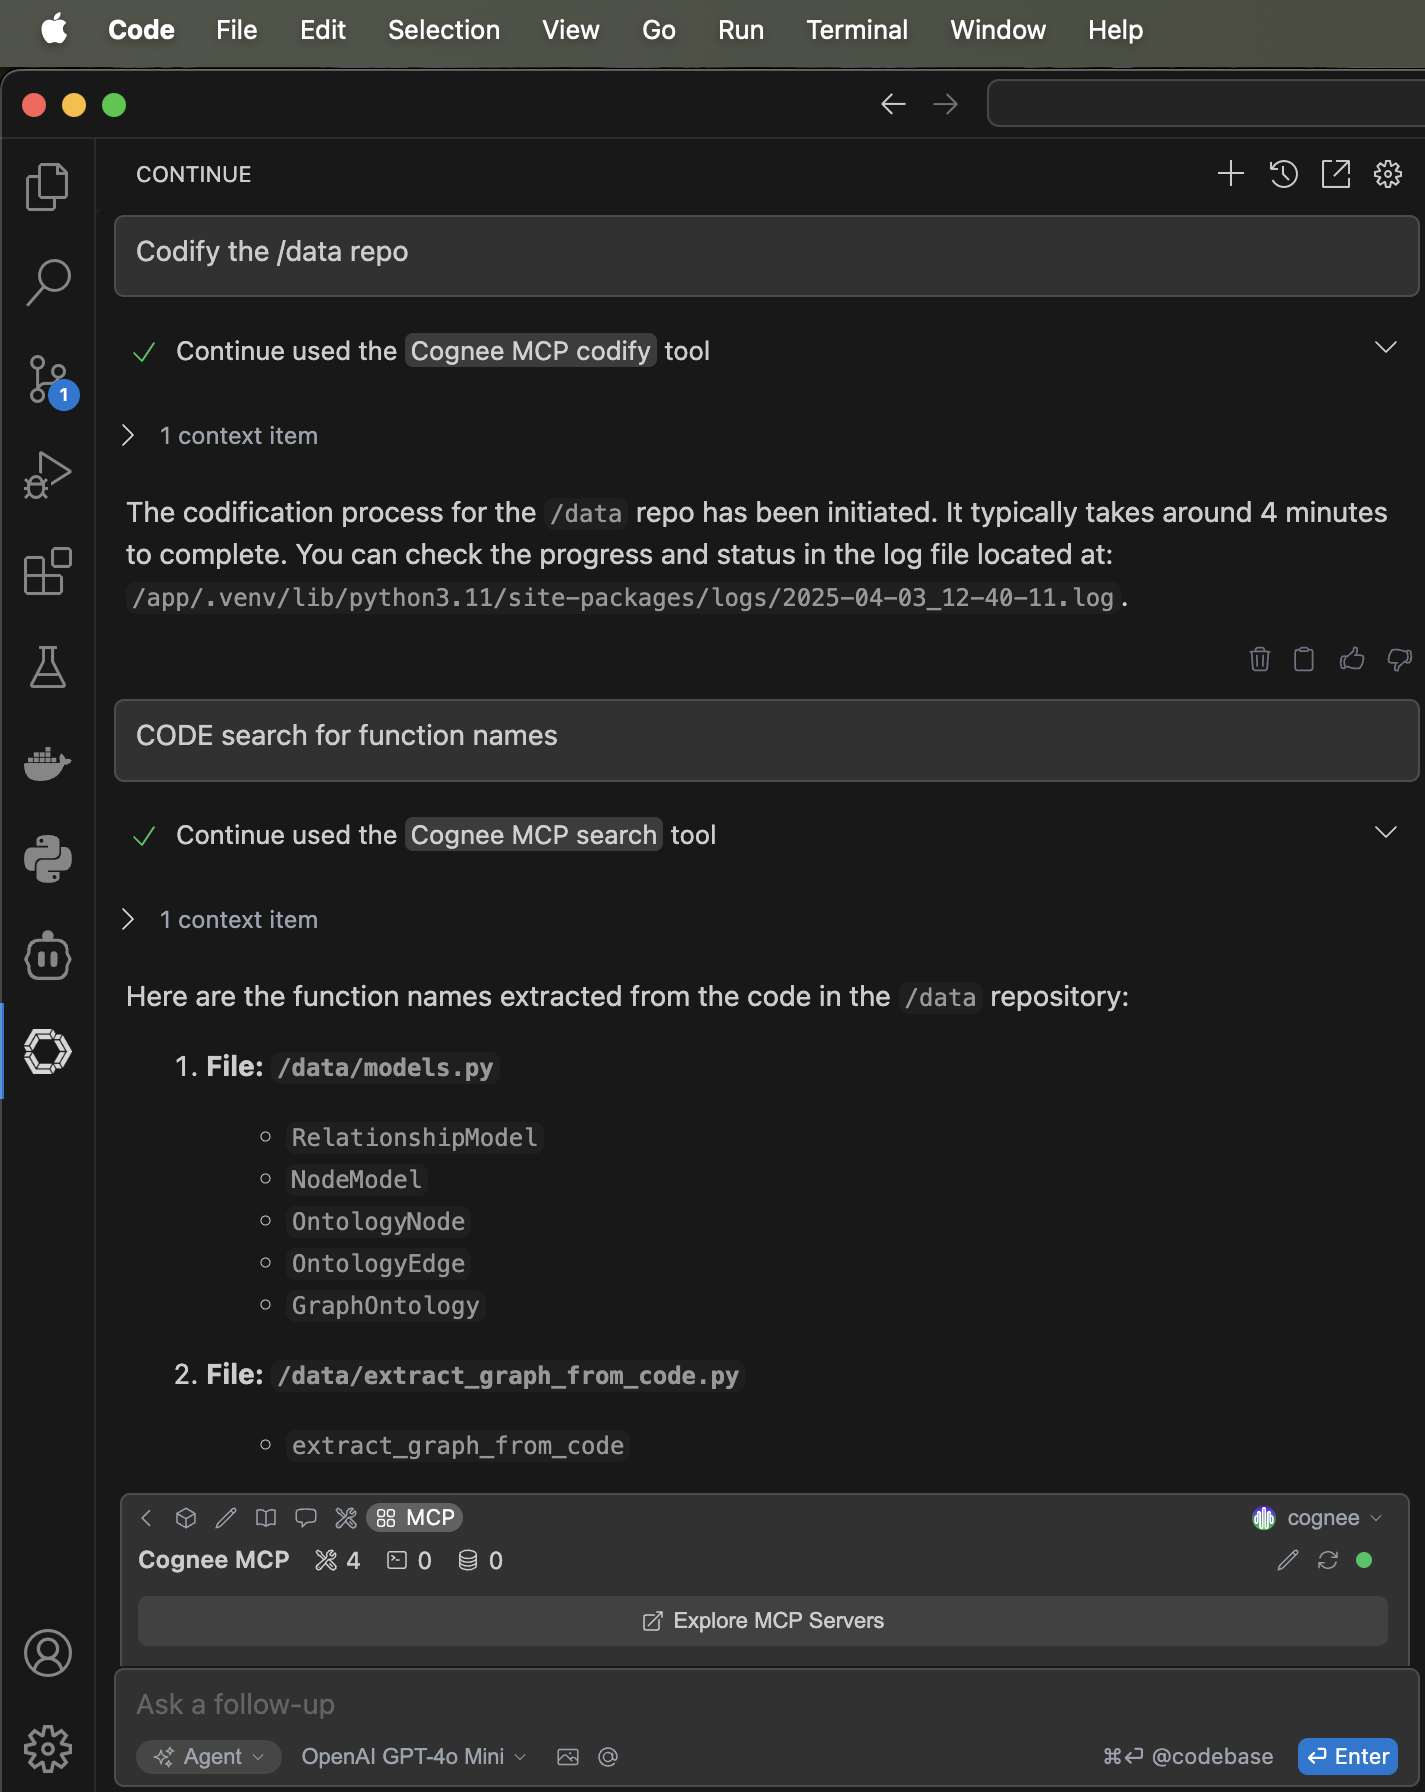
Prompt Continue with exactly the following:
Codify the /data repoIf everything is properly connected it will start the codify process on your repo provided with COGNEE_SHARED_DIR_PATH. The /data directory in the prompt is where your repo has been stored in the Cognee docker container.
To ask questions about your codebase you can use the following kind of prompt:
CODE search for function names-
Open your project and start a new Continue session to generate a knowledge graph:
This prompt will let Cognee know to use the CODE search type to ask about function names. Any other question can be asked about your code as well. For example:
CODE search for class namesThe prompt above will return all classes in your code base
-
Get more accurate and contextually aware suggestions
6. (Optional) Deploy your own Cognee MCP Server locally
If you want to make custom changes to Cognee and the Cognee MCP Server, you can deploy it locally. This is an optional step if you are satisfied with the default Cognee configuration. Install Cognee MCP Server
Join the Conversation!
Have questions? Join our community now to connect with professionals, share insights, and get your questions answered!